Tuesday, December 23, 2008

Memories

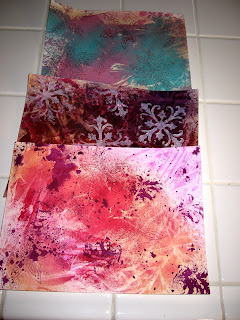
A few of Jeff's sketches -- click on the images to see more detail.


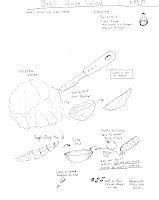
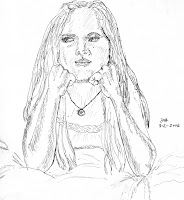
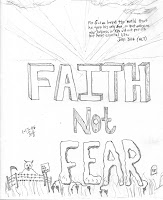
After reading Kathleen's blog this morning, I thought about the passages of life. I remember when my son was born and his growing years. He loved Dr. Seuss books and drew very elaborate sketches that let me know he would someday be an engineer or something similar. His sketches were so detailed. Was I surprised when he chose computer programming? Not one bit. As years passed I remember the feelings I had when he left home, married and started his own family. I realized that although I would continue to be a mother, that "child rearing" stage of my life had passed. I was proud of him. He and his wife had two beautiful girls, and he adored them. Then one day he discovered a lump above his ankle which turned out to be malignant. I had just retired (the Universe knows what it's doing), and so I was available to accompany him to his chemo, radiation and surgeries. Many days we spent driving into Los Angeles, and I'm grateful for those days because we talked like we had never talked, just the two of us. He began to sketch again. He made his transition the end of February 2007, so it has been almost two years. His girls are growing up. His wife is working and being a wonderful mom. We all miss him so much. I'm posting some of his art as a tribute to his life. Peace.


Sunday, December 21, 2008

Christmas Ornaments


Three of the handmade ornaments I gave as gifts this year. Thank you, Susan, for the prompt!!

Button Box


The results of my rummaging through the family button jar and remembering the project in an Old Victorian magazine. Very nostalgic.

Thursday, December 18, 2008

The Button Jar

I started a project today -- an idea I got from an old Victoria magazine. I covered a box with "aged" papers and glued pearl buttons on the top. When it is dry I will tie an organza bow around it. In doing this I had to go through the "button jar" to separate the pearl buttons from the others. I started thinking about how this button jar came from my mom who was a wonderful seamstress. I continued to add loose and extra buttons to the jar over the years. As I sorted through the buttons I thought about my mom and the items she made for me - suits, dresses, prom dresses, etc. I can see her sitting at the sewing machine now. I wish she had taught me to sew. I looked at each button and thought about the history it might have had. Some of the buttons reminded me of past clothing I had. The clothes are long gone, but the extra buttons remain. There's the covered button to my purple suit with the fitted jacket. It was one of my faves. There were the covered buttons for my off-white suit and my blush pink suit. Some of the buttons were from my mom's clothes, and there were even some from my grandmother's clothes. There was even a little placket of tiny pearl buttons. I don't know what they were for, but they will be great in a collage. Such memories had me day-dreaming for at least an hour. Now about the only buttons that will go in that jar are extras for a sweater or jeans. I'm not adding a lot to it these days. Don't need the work wardrobe anymore.
Add Video

Thursday, December 11, 2008

Metallic Rub-on Over Embossed Wallpaper


This is my version of Ina's fatbook technique. It works much better on a paper that is highly embossed. It's more difficult to put on an even coat in the flat areas. You can see where I put my finger down too hard to start rubbing. I did not have colors other than the brass, gold, bronze, olive set. Some red and teal might have been fun on this. Also this is just a scrap I had lying around so you can see where the paper had been folded. It's a fun technique to do, but I wonder if I could use a cosmetic sponge and save my fingers. I don't know how she did 120 pages. My fingers would have fallen off.

Wednesday, December 10, 2008

Fun Techniques


These are two new techniques for me. The bottom image represents one of the techniques from the 120 page fatbook swap I did. This combed gesso with image embedded while gesso still wet technique is courtesy of Angela Cartwright. Thank you, Angela.


The image at the top is a sample of a technique I like called the bandana effect. There's a great tutorial for this here. Thank you, Lisa. Lisa has a terrific blog with so much to view and learn! I could stay on this one blog for several days.


Monday, December 08, 2008

First Digital Scrapbook Page

My first digital scrapbook page -- I have a long way to go on my photo editing skills, but I love Robenmarie's digital kits. This one is a free download, and it was perfect for me to play around with. Do see her shop on her beautifully updated website. She has some great digital scrap kits. You can find the free download along with other great scrap supplies at her shop Paperbag Studios.

Thursday, December 04, 2008

Air Dry Molds

Not the greatest pic. The green one sort of looks like a sluggy four-armed octopus. It's really a mint green. These molds are a little larger than your thumbnail. They are perfect for embellishments. It took some tinkering as I was using the air dry type of clay. I did not want to bake clay. There are other things I bake, but craft clay is not one of them!! I tried powdering the inside of the mold but clay would not release. I tried freezing the mold with the clay. No luck. I tried refrigerating. No luck. I finally tried rinsing the mold in water prior to inserting the clay. Yay! That worked. That little residue of water in the mold released the clay easily. I had to let them dry for a good 24 hours and then barely sanded around the few rough edges. Then I painted with acrylic washes and quickly added glitter before the paint dried on the pink and green samples. I used my Krylon gold leaf pen on the turquoise sample. I saw a spread in Cloth Paper Scissors by Beryl Taylor and her embellishments looked so enticing. That made me decide I wanted to make some, especially since she makes hers with air dry clay. These little molds came from Mad About Molds They have great instructions and tutorials right on the website. They have over 800 molds to choose from. That should keep you busy. I never did recover from mudpie making as a child!!

The Trikke


Yours truly learning the Trikke. It's like two skateboards on training wheels!! It's somewhat like skating, somewhat like skiing. Believe me the downhill is just the greatest "high", but the real workout is uphill. I haven't mastered the technique quite yet for uphill, so I still do a lot of pushing off. Because my right side is dominant I push off with my right foot, thereby causing my right calf muscle and left butt cheek to be really SORE!!! This tends to make me walk sort of lopsided -- not a pretty site. Please, please God, let me get this technique soon! If you think it looks fun you can see more at Trikke's website. Or go to Youtube and entertain yourself for hours. There's one lady who is chronicling almost every day from the start of her learning curve. After watching her (and she's a hoot) I decided I KNOW I can do it.

Altered Journal

It seems like forever since I've posted!! I'm having so much fun, but I have certainly gotten myself into a lot of projects. I'm still taking my on-line Photoshop class, and I'm taking this four week class from Sarah Whitmire. My friend Michi invited me to join a class taught by a former contributing editor to Stampington - Sylvia Valle. Every Tuesday I take her morning and afternoon classes which involve rubber stamping and more. Plus my dh and I have started Trikkeing. I'll post a pic and link so you can see what it's all about. It is just so much fun and a real full body workout (but much more fun than the gym). It's just beginning to catch on in my area. However, it's not an excuse to forget about the gym, so I'm still doing that. Trying to keep up with just one or two on-line groups is getting more diffucult from a time perspective. Even though I'm enjoying every minute, I still like my alone time to work just my Muse and me!! So that's what I'm doing today -- well, after I run a couple errands.

Saturday, November 29, 2008

Embroidered Christmas Tree


Made this card in a class I'm taking from Sylvia Valle, a former contributing editor for Stampington. Now I know why I don't quilt. I almost flunked geometry. Following a pattern is not really my thing. The fact that I was not using the correct needle made it very tedious. But I was just plain determined to finish it whether I liked it or not. I'm making another card with some random beading, and I like that. Just don't give me that counting pattern thing!!!! Sylvia is a wonderful teacher. It's just that I am a retard in that area!

Monday, November 17, 2008

Melted Crayon Technique

The Yahoo group I belong to - Arttechniques - did a fat book swap with 120
participants and each participant did a different technique. This is my rendition of
painting with melted crayon.

Envy

This past week-end I got some beautiful molds for embellishments to my artwork. I'm either doing something wrong, or I'm going to need a lot of practice. I used Crayola Fusion air dry clay, as I really want to avoid "cooking". I've been told if I'm going to bake clay I need to have a dedicated toaster oven and not use the one I cook in for consumption. I don't know if it's the clay or me -- the clay is too soft to remove from the mold to dry. I've tried removing from the mold immediately. I've tried cooling in the frig. I've tried the freezer. First time I forgot to powder for a release agent, but I have tried several other times using cornstarch for a release. Nothing seems to work. The conundrum -- try a different clay or try a different release agent like water. I think I'll try the water. I did manage to do this sketch of the two girls. That gave me some satisfaction. Okay, back to the kitchen counter for another try. Wish me luck!!

Thursday, November 13, 2008

tar gel over painted paper

I did not realize it's been so long since I posted. I've been wrestling with a Trojan horse virus and finally was able to rid my computer of the pesky threat. Why can't these people find something positive to do with their skills? Aarrgh!!!! This is clear tar gel dribbled over painted paper. It's one of the techniques from our fat book swap. Thank you Nancy Lynn. I like the way the tar gel picks up the colors underneath it and changes as the colors change. It's a little difficult to see here. She also suggests dribbling the tar gel over white paper and then painting over it after it dries. The tar gel will stay clear.

Tuesday, November 04, 2008

Mini Zine/Journals

I promised to post my finished project using some art supplies that are neglected. I randomly picked several items with no idea what I would do with them. You can see the items in the previous post. The easiest project was a mini book. Here are three samples of these books. The one titled "Scrap Book" was the one I did for this project, and it was also a way to use up some ephemera, scraps and papers I've been hoarding. I know none of us does this, but.....I still have lots and lots of scraps even after my last purge. It's so simple. I just pick some sort of painted or decorated cardstock and cut to size to be the cover and fold it in half. I then cut slightly smaller pieces of whatever -- painted papers, specialty papers or cardstock and decorate them with scraps. I "bind" the book using a couple staples (so you have to leave about 1/4 to 1/3" clearance as that part will be stapled over). Then I glue on some type of ornamentation to hide the staples. EASY!!!! You could even use ATCs and bind this way. My pages are not quite but almost that size.


My least favorite supply was the "blow pens" - Why exhaust my lungs when I could just use misters?? I'm sure there was a really important reason I purchased them at the time.


Thursday, October 30, 2008

Scraps & Miscellaneous

This is one of those projects that came from looking at other artists' blogs. I have looked at so many I can't remember who offered up this challenge, but it was to dig around in your supplies, pick several things you do not use and make something with your findings. Well, I did not have a problem doing that -- there are literally hundreds of supplies I don't use on a regular basis, and they are things I purchased because I just had to have them to enhance my art. Okay, the top pic here is the beginnings of a mini journal or mini zine using the items shown in the pic below it. I just grabbed and did not pay attention to colors or anything. Then it was "what am I going to make with this stuff?" I had my double plastic wrap overstamped watercolor papers, so I decided to make the mini journal/zine. I'll post more pics when I'm finished.
Well, I do use the Jelly Roll pens but I needed something familiar.....

Sunday, October 26, 2008

Om

I was really thinking about how much I wish we could have peace in the world. If we could only see ourselves as "one", because we truly are. The world would be so much better. It seems so naive but it's worth wishing for. That said, this is a page out of my journal. I used inks over gesso and attached an image that I printed on tissue paper. Then there is the ubiquitous rubber stamp. Where would I be without rubber stamps. They are what started my on my artistic path. My taste in rubber stamps has changed a lot, but they certainly have their place. I do love them. Back to my thought for peace, I heard John Lennon singing "Imagine" on the radio this morning. I've heard the lyrics many times, but today I listened. This is for you, John!

Saturday, October 25, 2008

Double plastic wrap overstamped papers

Here are some more overstamped double plastic wrap background watercolor papers which I intend to use for mini journals/zines like the two below.
You can find out how to make these papers on Susan's blog


Mini Zines


Thursday, October 23, 2008

Success/Failure

I've been working with transparency transfers. There is one success
on the bottom left of this page and one failure on the top right
I seem to have no problem transfering in this manner
with black and white but when it comes
to color, no luck. I'm using Golden soft gel matte
on both the image and the substrate
I tried several color transfers on scratch paper
and the same problem. I also tried spitzing with alcohol - no luck
with that either.
I'm going to try some other transfers with Great White paper.
Those work well for me. I just like the
instant gratification I get
with the transparency transfer.
I don't have to wait for it to dry completely.
It's been a frustrating morning, but this is how I learn.Someone said "If at first you don't succeed, try try again!" It's not
very deep thinking but it's so true!

Wednesday, October 22, 2008

New Face

My blog has been undergoing reconstruction. I drove myself crazy trying to create my own
banner to fit across the top and finally found out that my template would not allow for that. So I
changed my template. Now I just need to figure out how to add text to my picture that I'm
using. Stay tuned -- it may actually happen in the next day or two. We are having a really hot
spell in Southern California -- in the high 80's - 90's, so I think we will go to one of our favorite
restaurants and sit outside to enjoy the balmy weather into the evening.

Wednesday, October 15, 2008

Paper Bag Study 3

My third in a series of three paper bag studies. I used charcoal, graphite, colored pencils and a pitt pen. I really like the effect of colored pencils on the paper bag. Even though I know our eyes are not exactly symmetrical, I always try to get them exactly perfect. I missed perfection in this one. I'm just happy that I'm drawing something everyday.

Sunday, October 12, 2008

Paper Bag Study 2


Second paper bag study. I'm really into the eye with the flower for some reason! Used charcoal pencil, colored pencils, Faber Castell pitt pen, some pigment ink, and the Uniball Signo white gel pen. I like the way the eye turned out. I'm really liking this brown paper too. I need to do a third for a series, so stay tuned! I eventually will do a self portrait and reading Mixed-Media Self-Portraits . I finally got a copy after waiting forever.

Wednesday, October 08, 2008

Paper Bag Study


This is the first of a series of paper bag drawings. I want to
play with some different
mediums. I used a micron pen,
a pitt pen, colored
markers, and colored pencils. I think I'll also use
charcoal on my next drawing.

Tuesday, October 07, 2008

Delightful


Still feeling "in the pink" I used
a large transparency that
I had made with
3M transparency. After
learning that 3M changed their
formula and it was no longer effective
for transfers, I kept them
to use for transparent
works. I like this
sketch and will probably use
it many times.
The heart is a piece of clip art
but it almost looks
transparent too.

Great Love

I'm lucky to have my "great love" and we share a glass of wine here and there. Champagne is the absolute best for special occasions. Yesterday was one of those days where my muse was sleeping but I was determined to put a couple works together. This one is just scraps of paper I had lying around, a piece of clip art and some ribbon. Oh, and my Uniball Signo white pen! It is the best!!!! I've tried Sharpie poster paint markers and White Out and Jelly Roll. None work like this pen. It writes over just about anything and does not skip!!!!

Sunday, October 05, 2008

Color Mixing Exercises

After reading Above the Mark's "how tos", I hit upon this color mixing exercise, and that is how I learned about the book "Blue and Yellow Don't Make Green". I decided to order the book and try the exercises. Beth at Above the Mark was even kind enough to post a blank worksheet for us to do the exercises on. Here are my first few exercises using two colors and then adding increments of white to get lighter tints. Below this series of exercises I posted a couple of my journal pages using one of the color exercises so be sure to scroll down. The information to purchase the book is included in that post as well.


Oops, didn't quite finish this one

Saturday, October 04, 2008

Color Study 2 Sample


Playing with cerulean blue and hansa yellow color mixing. I bought the book Blue and Yellow Don't Make Green and so far have done about 5 of the color exercises. Had some leftover paint so I played in my journal . I should have purchased this book before I purchased so many tubes of paint. It's amazing how many colors you can make with a very limited number of colors. Not that I always want to mix colors for every endeavor but it's nice to know that I can. Sherre at Arttechniques group is also doing a color principles workshop. I love this group because it has so many talented members who share, share, and share.

Friday, October 03, 2008

Note Cards

These are note cards using one of my sketches. A friend asked me to make some note cards for her. It was another computer CHALLENGE!!! not having done this. It seems so simple now that I've done it, but I must have spent 2 hours just trying to figure out how to work with a template. My friend Lin had previously sent me some collage napkins and enclosed a beautiful embossed note with one of her watercolor sketches. Do go to her blog and see all her wonderful sketches. I emailed her and asked how she did it. She sent me downloads of horizontal and vertical templates. My challenge was that I could not figure out how to place my image within the embossed borders. Couple emails later and I finally figured out I could click on the image and drag in the corners. It's so easy unless you don't know how to do it. I like these because there are times when I don't want to send a totally handmade card with lots of work on it knowing it's going to be tossed. (But Lin, I still have your luscious olive branch note card and plan to keep it. ) This way I'm out a note card and some printer ink. It's so much fun just learning little things on the computer. I'm frustrated when I don't get it, but totally jazzed when I finally do get it!!!

Double Plastic Wrap Technique

The results of my attempt at Susan's overstamped double saran wrap technique. I will post some more as I attempt to get a better result. The top one I tried on matte coat cardstock and found that watercolor paper is much better as Susan instructs. The middle paper was waaaaay too dark, so overstamped with white gesso. I like the colors on the bottom paper the best but spraying the rubber image did not work so well. Probably had the image too wet. Okay, back to the "drawing" board.

Wednesday, October 01, 2008

It's Award Day


It's my lucky day again! Thank you, Michi, for this award! Gee, I'm going to have to step up here and get a little more creative with my blog - like figure out how to do a new banner/header. There are so many really creative blogs out there and I drool with the images, content and general layout of the blogs. Also so many of you are such creative writers!!! So it's my pleasure to pass this on to some very deserving artists. Besides being great artists, they are willing to share their talent with others. I've learned a lot from following these blogs, so go visit them and enjoy! Don't forget to pass this on to give others the joy!
  1. http://zuzuspetalsstuff.blogspot.com/
  2. http://expressionstudio.blogspot.com/
  3. http://tommykane.blogspot.com/
  4. http://katherineq.blogspot.com/
  5. http://trishbee.co.uk/
  6. http://allnorahsart.blogspot.com/
  7. http://viewfromtheoak.blogspot.com/

Thursday, September 25, 2008

Little Miss Barrymore

I'm continuing my practice of faces. This one turned out with a certain likeness of a famous person? Must be the round face and pouty lips. I'm also trying to incorporate trash mail or junk mail in my journal art. Why not? Might as well keep it out of the landfill whenever possible. And I'm promising myself to use stamps and other items I haven't used in forever. You know what I mean. Raise your hand if you have any art supplies you haven't used in six months or longer!!! Un huh, I thought so. This one is really simple -- just the inside of a business junk mail envelope, some acrylic paint, draw the shape of the face, fill in with gesso and then paint and draw the details with a micron pen. I tried a Faber Castille "f". Just not fine enough for me. Maybe there is a finer point. And then one of those rubber stamps I just had to have several years ago because I love swirlies and this one was just a bit different. It was sure to enhance my artwork. I'm a sucker for any swirly!!! I have to put blinders on when I see them.